Welcome to our Manager's Handbook. Here you will find all the information you need to set up a campaign, to manage your agents and chats. Enjoy!
Logging In
To log in to the management interface, you need to go to this link and fill in your email address and password. Then click on the 'Login' button.
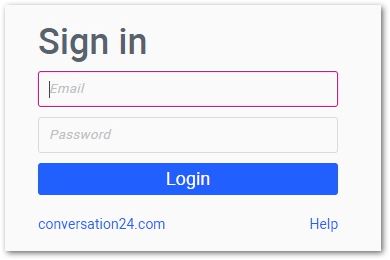
In case, you cannot log in, please use the ‘Help’ button at the right bottom of the login form. This will lead you to our help center. Otherwise, you can click on the website’s link and get in touch with one of our agents on chat for further help.
Manager's Interface
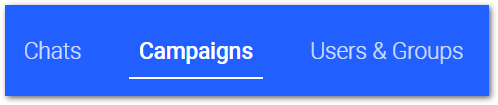
There are three main sections in the interface - Chats, Campaigns, and Users&Groups. The buttons to these are at the top of the page.

On the top right corner, there is the user’s menu where you can log out or retrieve the HTML code for the chosen website from the “Your Website” option.

Chats Section

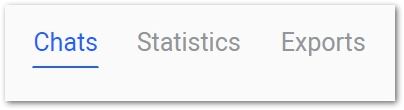
In the main Chats section, there are three subsections - Chats, Statistics, and Exports. You can find them on the left upper side of the page.
Chats
In the Chats section, you can see all the executed chats. The chats can be filtered by different indicators - date, agent, success code, participants, campaigns, type of conversation, and status. The indicators can be chosen from the drop-down menus at the top of the page.

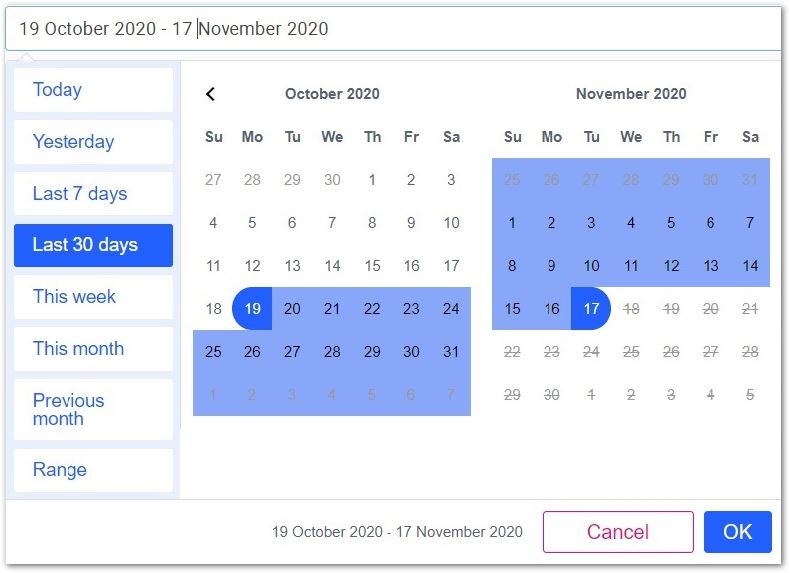
The date can be filtered in different ways - today, yesterday, last 7 days, or for a specific period of time.
When everything desired is filtered the list of chats is displayed. In the first field, it is the date of the chat, next is the type of the chat, start URL, the agent that handled the chat, chat rating (if enabled), and the duration.

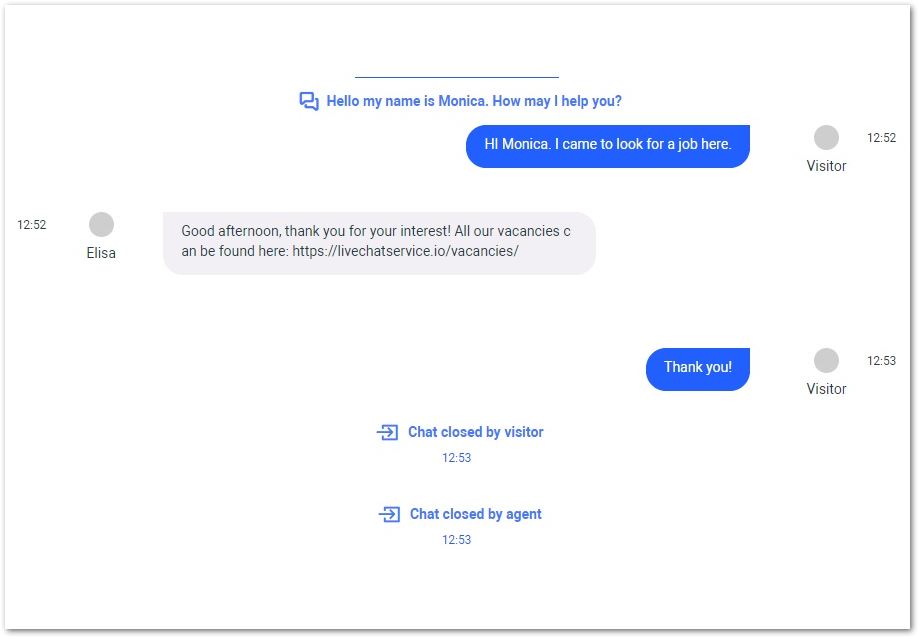
When you click on a specific chat, there is more information about it as well as its whole transcript. In the transcript, you can see everything that happened to the chat - if a customer left, if he came back if the chat was transferred among the agents, who and when closed the chat, etc.
Statistics
In the statistics section, you can see the statistics of the chats. The same indicators can be selected as in the chats section. The statistics available are the following:
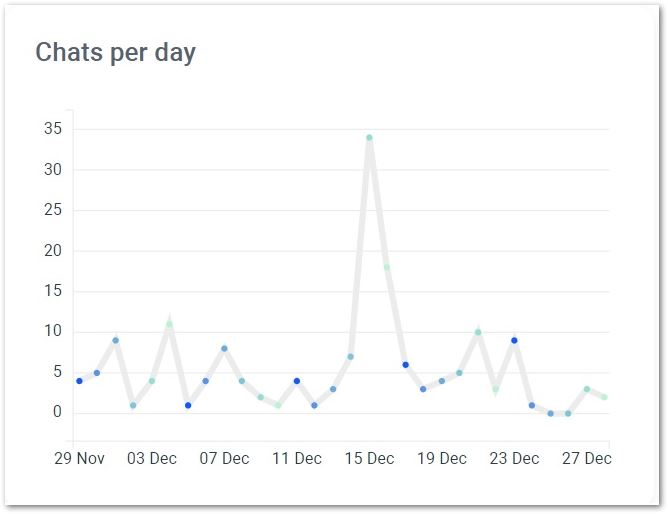
- Chats per day - it shows how many chats were executed for the chosen period of time
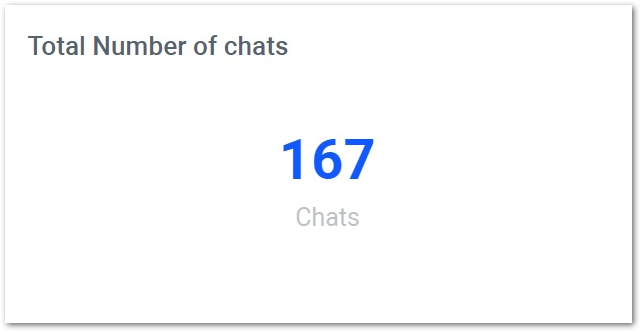
- Total number of chats - it shows the total number of chats that were handled in that time frame
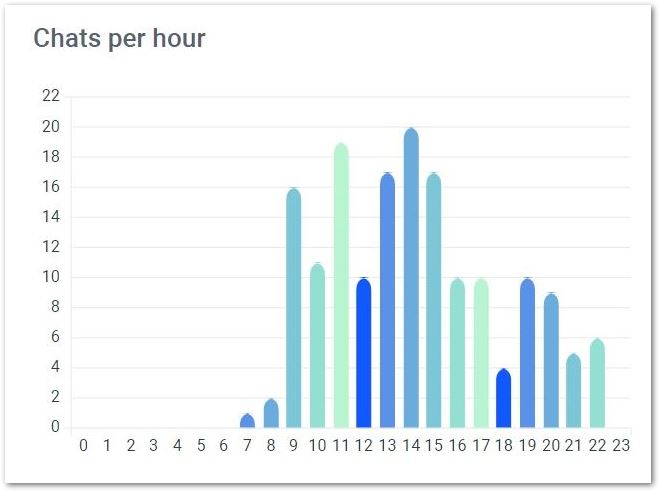
- Chats per hour - how many chats were there for each hour
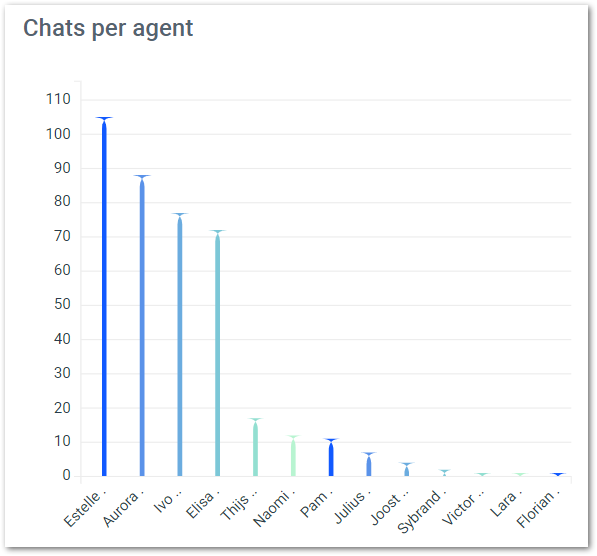
- Chats per agent - how many chats have the agents handled in that time frame
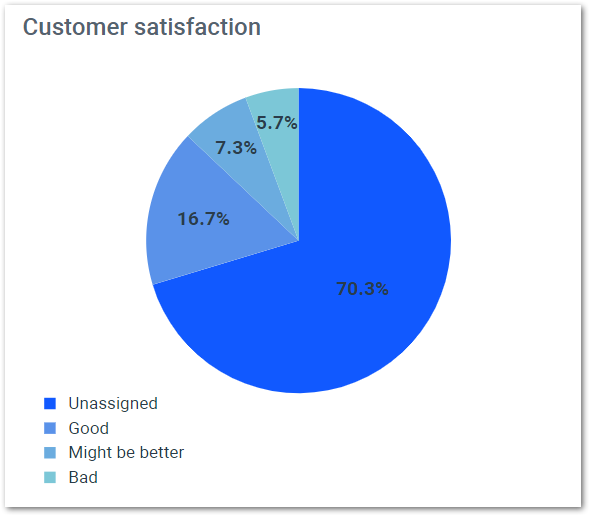
- Customer satisfaction - how were the chats rated by the customers if that option was enabled
- Proactive vs. Reactive - the percentage of proactive and reactive chats

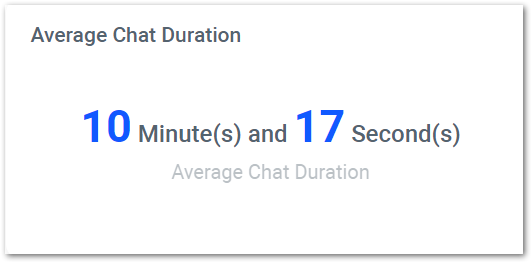
- Average chat duration - the average time of a chat duration
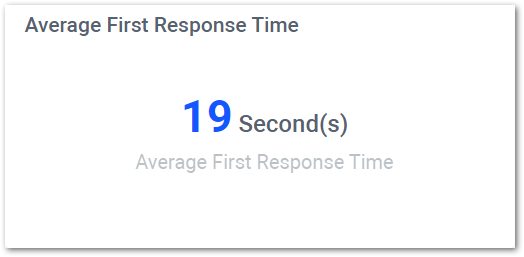
- Average first response time - the average time of the first response sent to the customer
- Success Codes - the percentage of used success codes

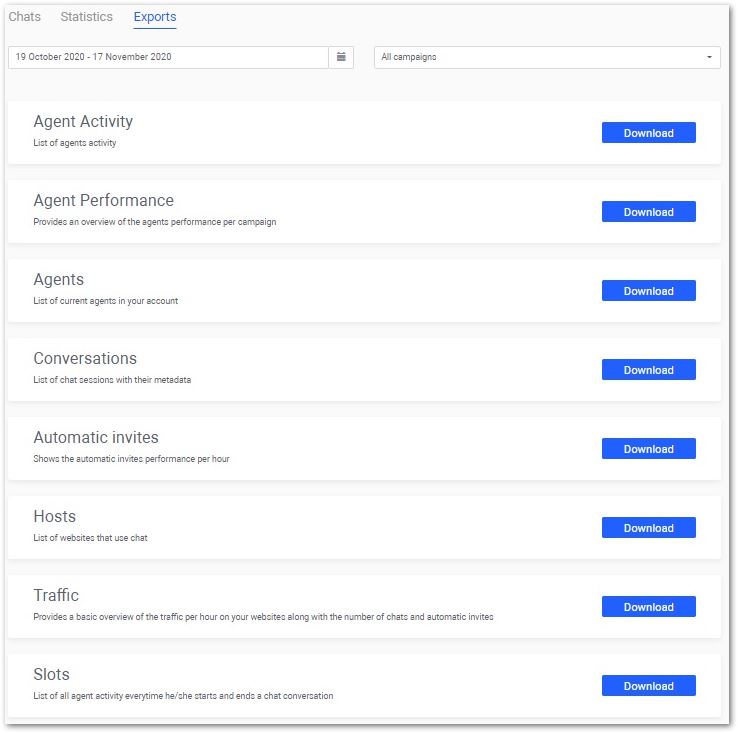
Exports
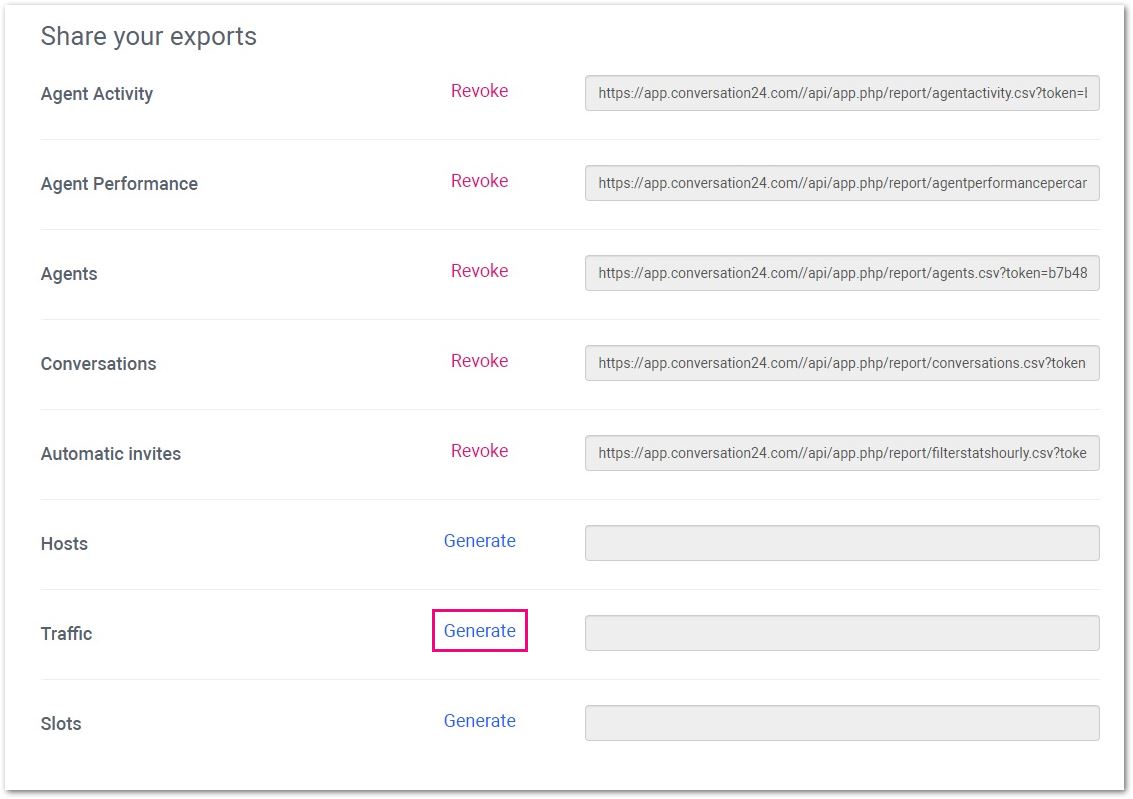
In this section, the following files can be exported:
| Agent Activity | This report provides information regarding the duration of operators' availability. In addition to that, you can use this report to determine which users were online during a specific time frame |
| Agent Performance | This report classifies the behavior of the operators depending on the chat duration, time of first response, duration of online and offline status |
| Agent | It is the static report, where you can see a list of the agents and their id, username, first name, last name, email, account id as well as the deleted agents |
| Conversations | With this report, you are able to obtain information about the number of chats generated, data on the agent's behavior, and data on the visitor's behavior |
| Automatic Invites | This report will tell everything that happened with the auto invites on the website for the chosen period of time. You will also see the invites that are not displayed because there were no available agents |
| Hosts | The report allows you to review the info about all websites that were added to your account and to check whether the site is owned by one or more accounts |
| Traffic | This report provides all visitor’s actions on your website (number of visits, visitors on the website, the quantity of viewed and accepted chats, and the number of automatic invitations) |
| Slots | This report shows an overview of the daily incoming chats and the behavior of the active agents of the day |
Below the report list, there is an option to show more settings. It allows you to generate a permanent link to a specific report with a secure token. With this token, the report can be downloaded without first logging in. An automated system can use this token to download the reports periodically.
The link that is generated gives unauthenticated access to that specific report in the account. The token will not work for another report or account. The generated token is designed to be cryptographically secure, thus very difficult to guess or attain using brute force.
Campaign Section
This is the section where all the campaigns added can be checked or a new campaign can be added and set in the desired way.
You can add a new campaign from the “Add Campaign” button on the right top corner.
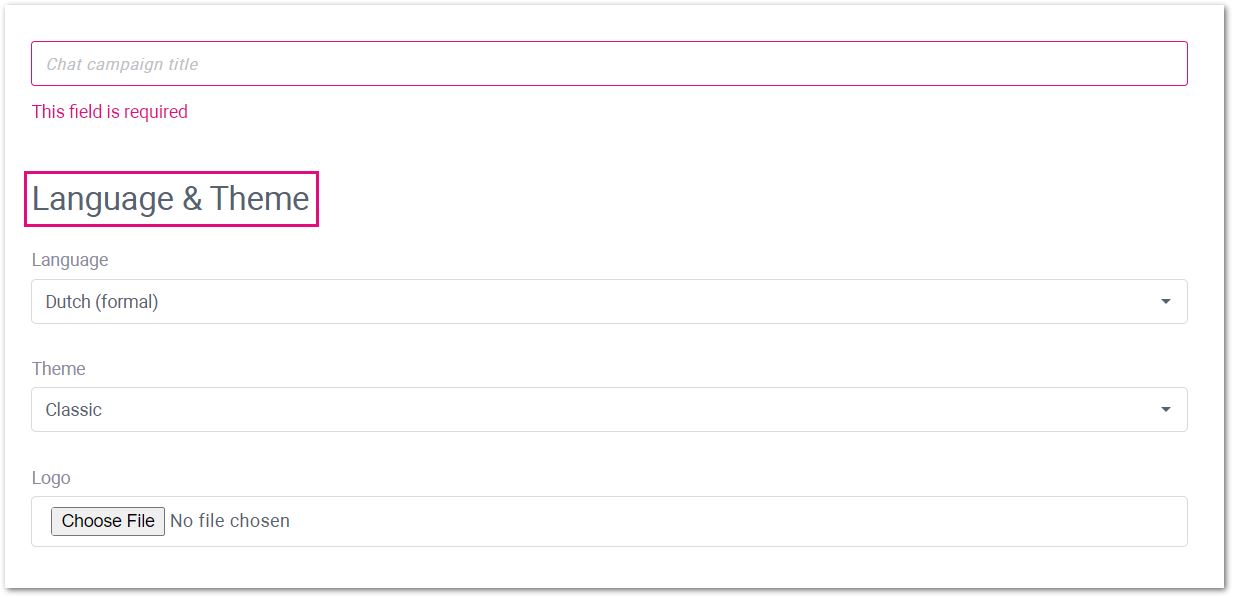
Once the “Add Campaign” is clicked, you need to fill in the details of the campaign to set it initially.

The title of the campaign is the first thing to add. In the “Language & Theme” section, you can set the language of the campaign, its theme, as well as the logo for it.
In Campaign Configuration, you can choose whether to set the campaign to all the websites or just to a specific one/s.

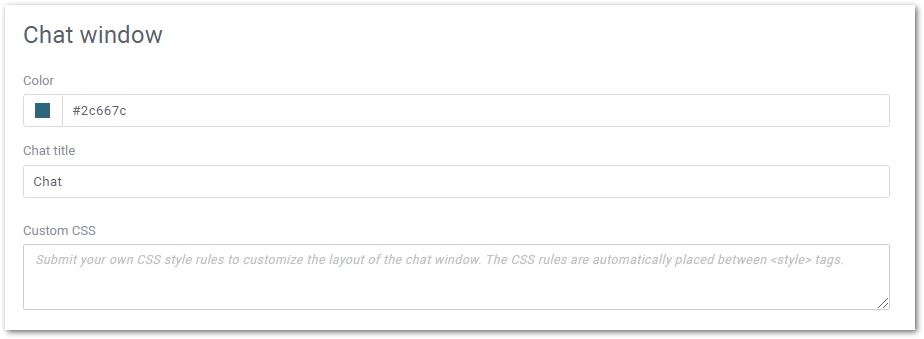
The chat window can be customized from the chat window section. There the color and the title can be set or you can use your own CSS code to style the chat window.
In the Interaction settings, you can set the pre-chat information, opening text, closing text, and auto-forwarding the chat.
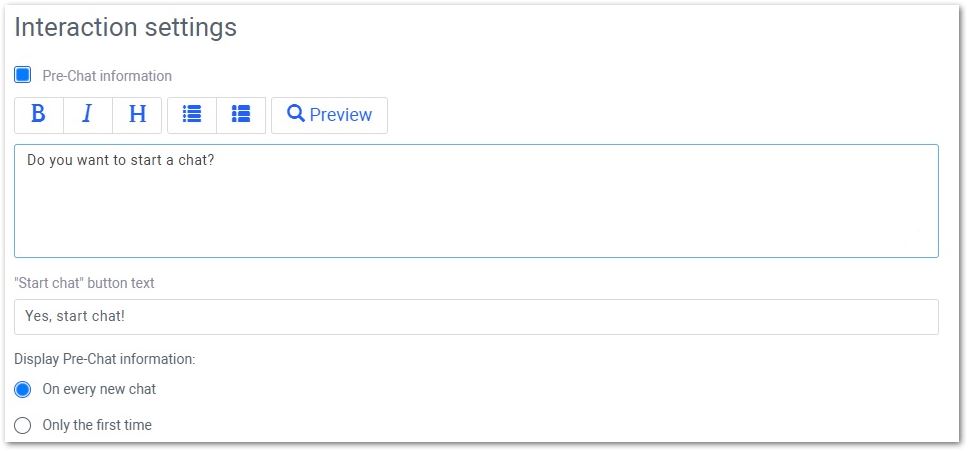
The pre-chat information is used when you would like the visitor to confirm they want to start the chat. In that case, a text that is set in the field will appear and the customer will need to click on a button set under the “Start chat” button text, to actually start the chat. This option can also be set to be available every time or only the first time the customer uses the webchat channel.
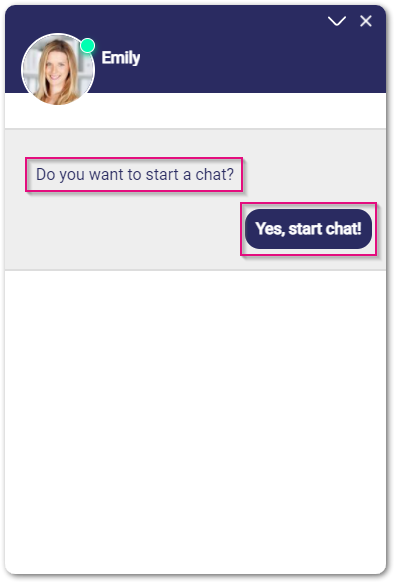
Once the visitor writes their message, the pre-chat information will show and they will need to click on the button to start a chat, in this example, the “Yes, start chat!” button.
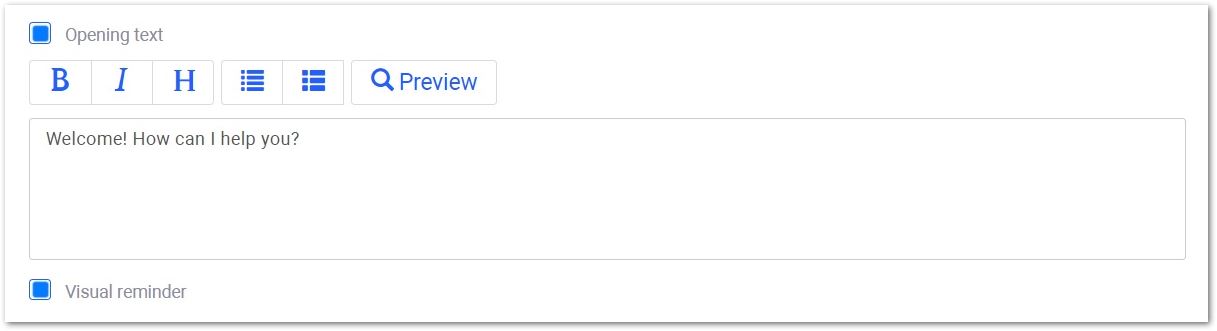
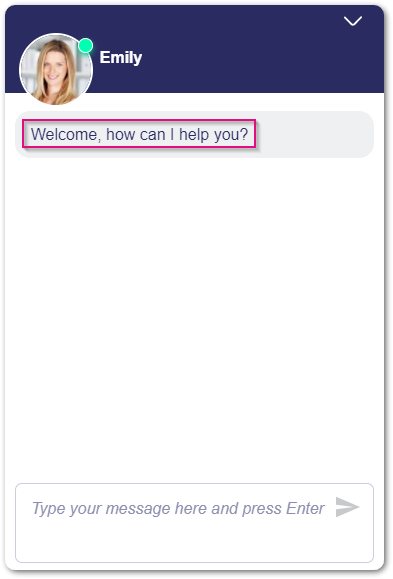
The opening text is the first pre-written message, the customers will receive once they open the chat window. If the visual reminder is selected, there will be a small reminder of the chat for the customer. The reminder makes the text slightly move.
The closing text is the text that will be sent to the customer once the agent or the visitor closes the chat.
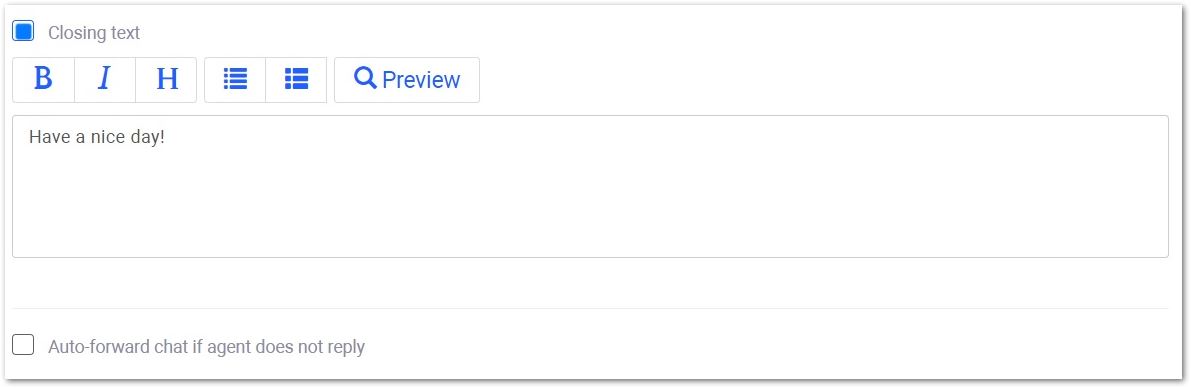

With the auto-forward option, the chat is being automatically forwarded to another agent if the first one doesn’t reply within a certain amount of time. The amount of time can be set between 10 and 60 seconds. There is also an option to avoid forwarding within the same routing level.

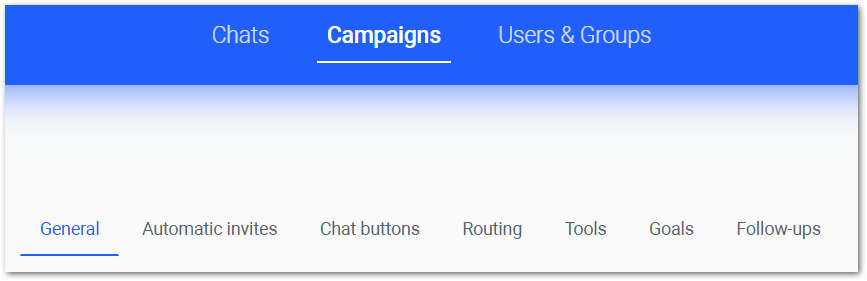
These are the initial settings when adding a campaign. In order to work on the advanced settings, you need to select the campaign from the campaign list shown when clicking on “Campaigns” from the top middle button.
Once the campaign is selected, the following subcategories appear:
- General
- Automatic Invites
- Chat buttons
- Routing
- Tools
- Goals
- Follow-ups
General
In the general tab, there are the initial settings set for a campaign - Name, Language & Theme, Campaign Configuration, Chat Window, Interaction settings. The initial settings set when the campaign was added can be changed from here. The only difference is that from here in the 'Campaign configuration' section, you can add a website from the 'Add Website' button at the bottom.

Buttons & Greetings
From this setting, you can set greetings such as chat popping up to initiate a conversation with the visitor or an “offline availability” message in case there are no agents available for the visitor to chat with. As well as adding, setting, and changing chat buttons.
In case a visitor tries to start a chat, he will receive the “Offline message”.
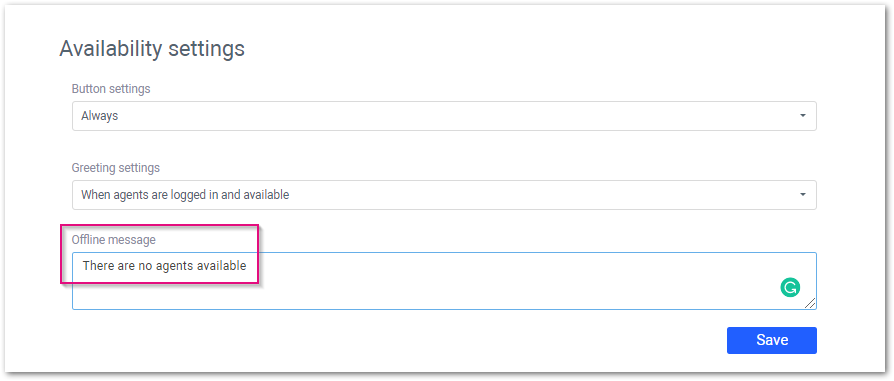
From the first two fields, you can change the availability for the button and for the greeting. You can choose between "Always", "When agents are logged in" and "When agents are logged in and available" for both.
List of Buttons & Greetings
In this section, you can manage the greetings and buttons and add more of them as well. To add a button or greeting, you need to click on the “Add Buttons & Greetings” button on the right side.
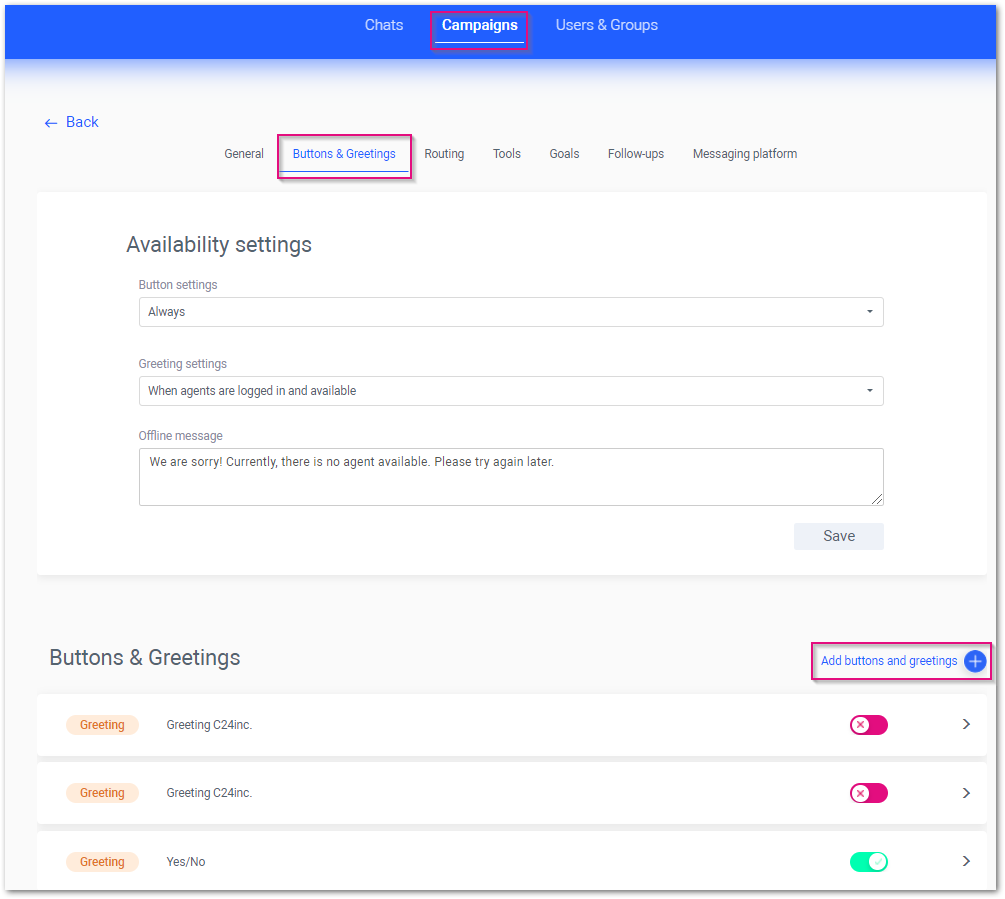
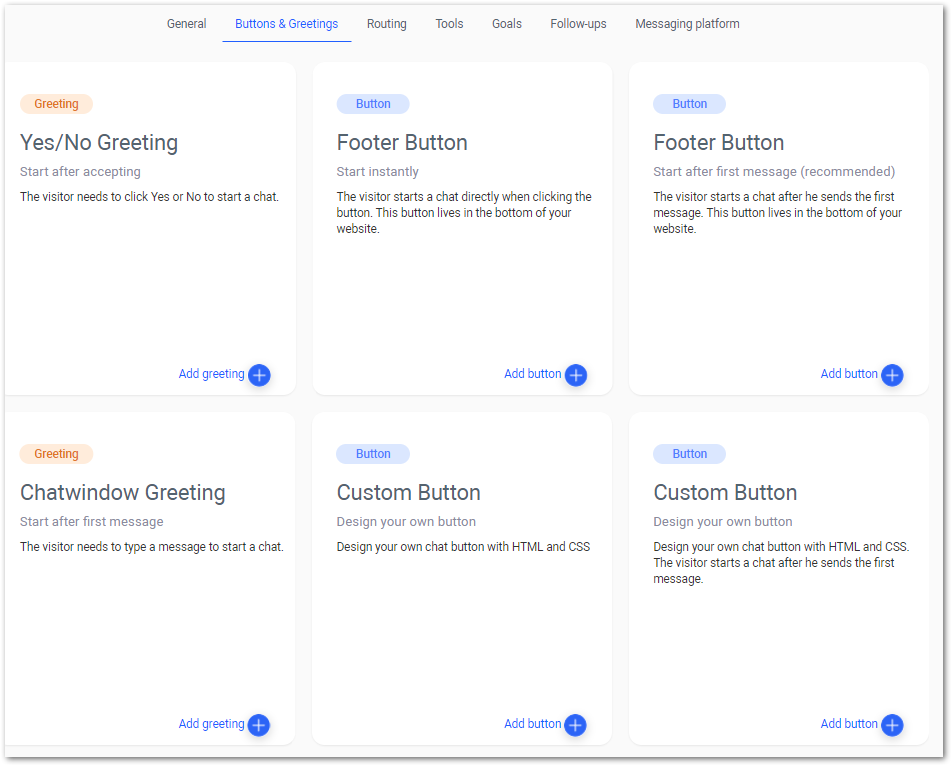
For the greetings, you can choose between “Yes/No greeting” and “Chatwindow greeting”.
With the Yes/No greeting the chat window will pop up on its own according to the criterion created for it.
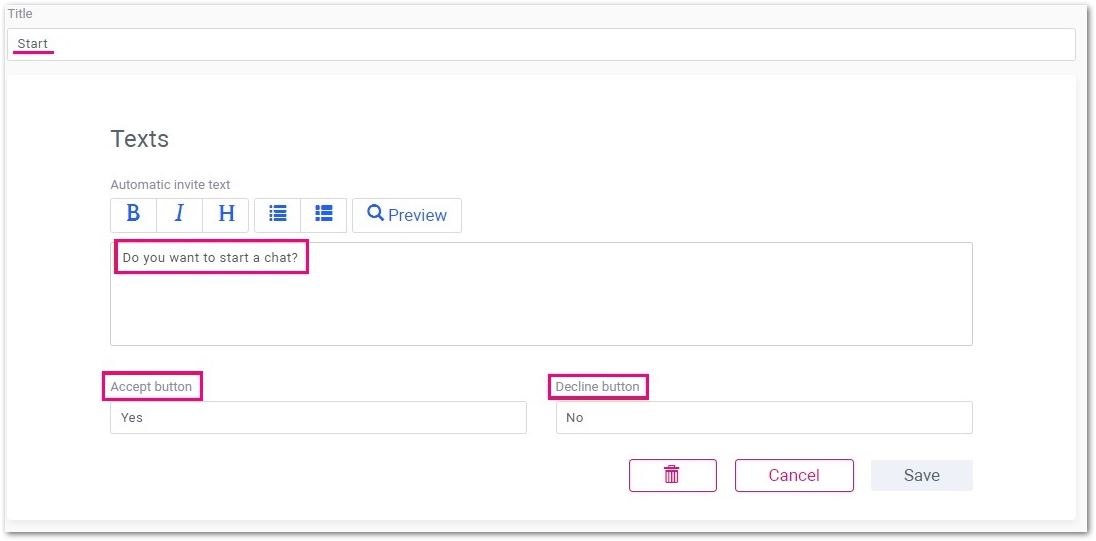
The first step to create the greeting is by giving it a title, setting up the text to show, and giving names to the accept and decline buttons.
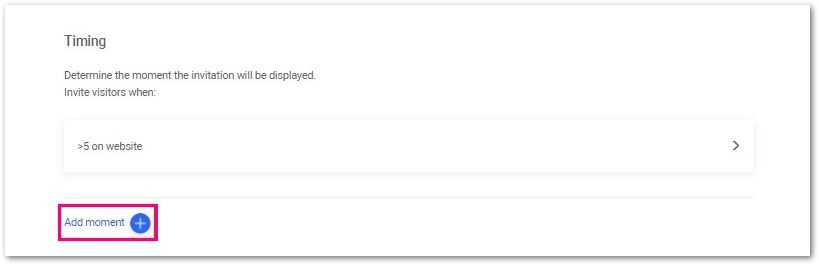
To add a moment and criterion, you need to click on the 'Add moment' button at the left bottom.
The moment needs to have a name as well, this can be set at the top of the page. To add criteria, you need to click on the 'Add criteria' button.
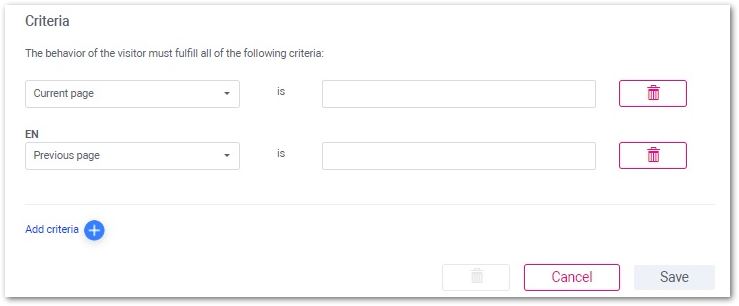
From the drop-down menu, the criteria can be changed - Current page, Previous page, Time on the page, Time on website. In the field next to it, you can set the certain page URL (current page or previous page) or the time in minutes (for time on page and time on website).
For example, if the criterion is set to time on page >= 2 minutes, the chat pop up will appear after the visitor has been on the website for 2 minutes.
With the chatwindow greeting, the visitor needs to type in a message in order to start a chat.
You need to add the title of the greeting as well as the text for it. Once you set these and click on the 'Save' button, the system will bring you back to the list. In order to set the timing for this greeting, you need to select it again and the timing section will be available at the bottom, where you will be able to press 'Add moment' to add the criteria. (same as above).
You can add many invites and just enable and disable them using the toggle on the right side in the List of invites.
To delete a greeting you need to click on it and then click on the trash bin button.

То add, set, and changе a button, you need to stay on the same section.
From the second section of the Buttons & Greetings section, more buttons can be added by clicking on “Add Button & greeting” on the right side.

The buttons that can be added are:
- Footer button: Start instantly - The visitor starts a chat directly when clicking the button. This button lives at the bottom of your website.
- Custom button: Design your own button - Design your own button with HTML and CSS
- Footer button: Starts after the first message(recommended) - The visitor starts a chat after he sends the first message. This button is at the bottom of your website.
- Custom button: Design your own button - Design your own button with HTML and CSS. The chat starts after the first message of the visitor.

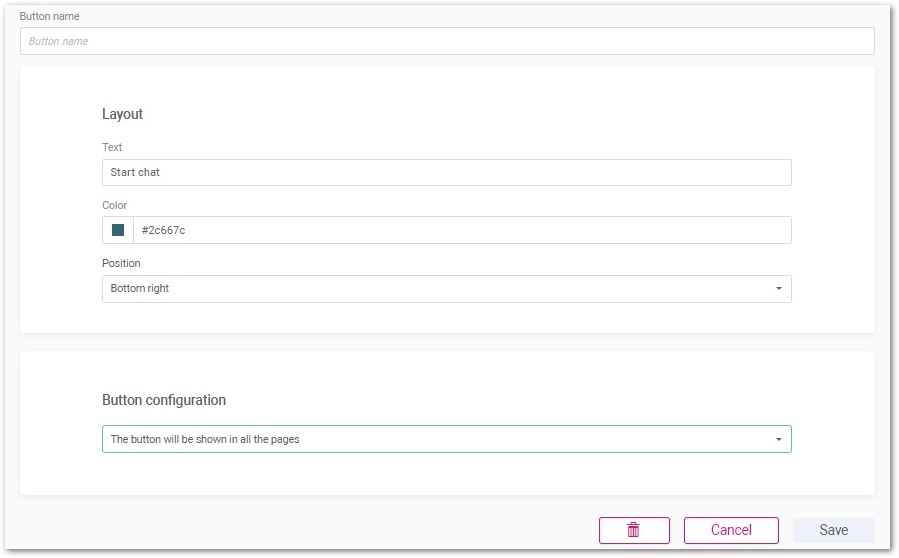
With the Footer button (start instantly) the chat will start once the visitor presses the chat button. To set it, you need to fill in the name, the text that would show while the chat is minimized, its color, the position, and its configuration. The position of the chat can be at the bottom right or bottom left. Its configuration can be shown on all pages or only on certain pages. For the latter, you need to fill in the URL fields that will appear after choosing that option.
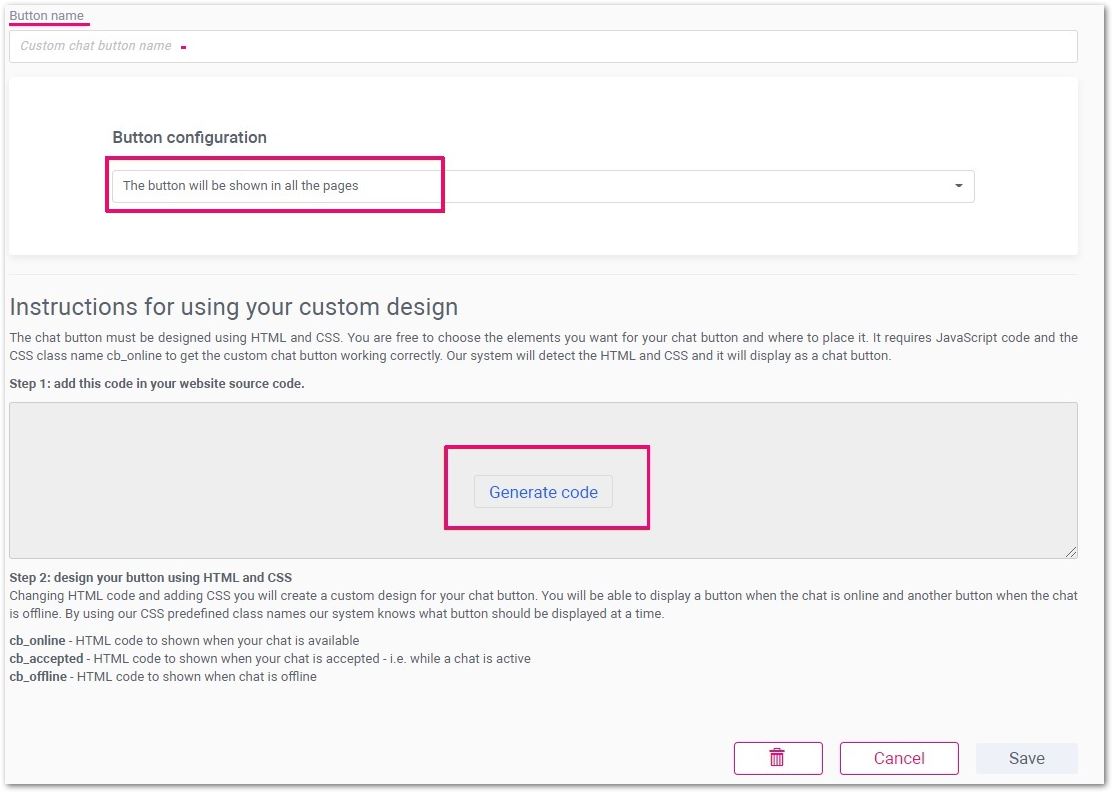
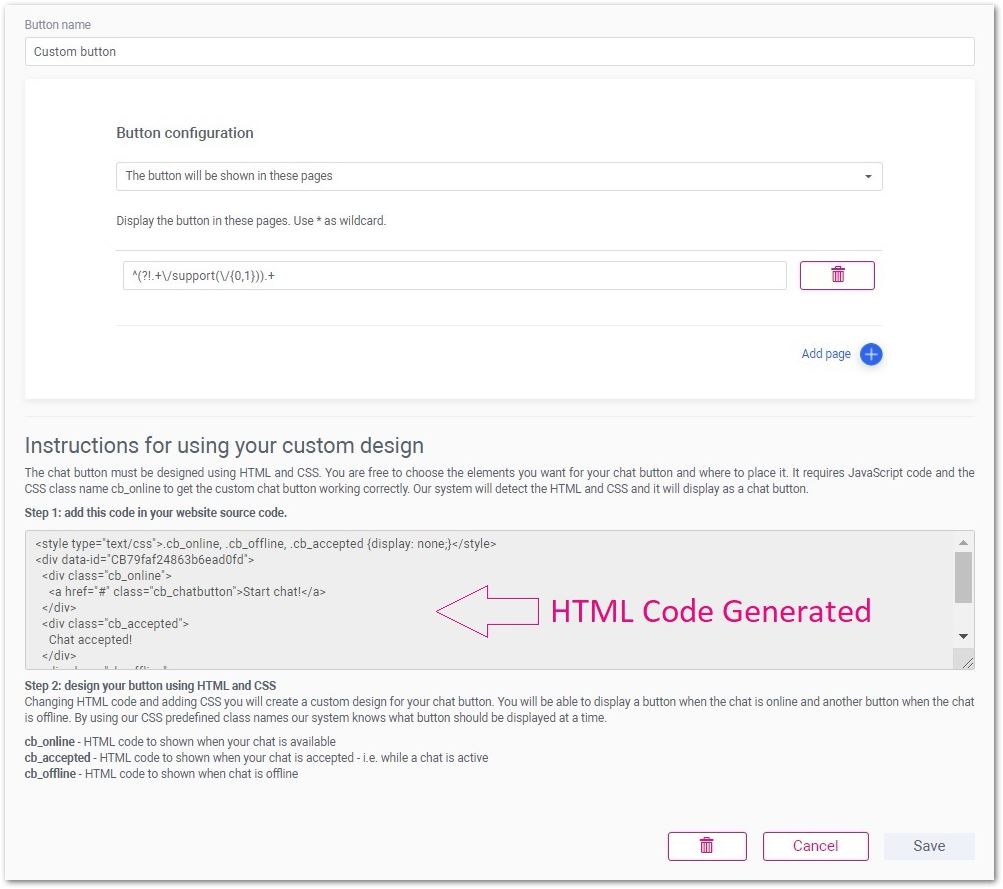
With the Custom Design button, you can create your own button, using HTML & CSS. To do that, you need to add a name for the button, set its configuration from the drop-down menu (add links if you want it to show to specific pages only) and click on generate code.
With the Footer button: (Start after first message) the chat will start after the visitors send their first message. The settings are the same as with the other footer button - name, text, color, position, and configuration.
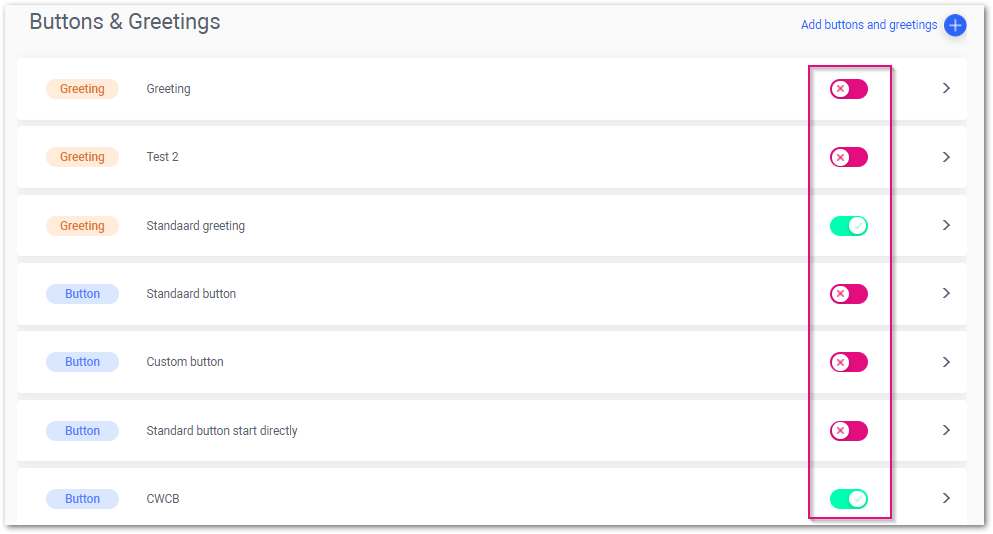
At the bottom of the chat buttons section, there is the list of created buttons & greetings and they can be enabled and disabled simply by using the toggle on the right side.

To change a button’s or a greeting’s settings, you just need to click on the button or greeting you wish to change and use the settings there.
Routing
This category helps you establish a routing order, supposed to assign incoming new messages to specific chat operators, following a defined model within that level. Different levels can be set up as a backup and every level can have its own group/users.
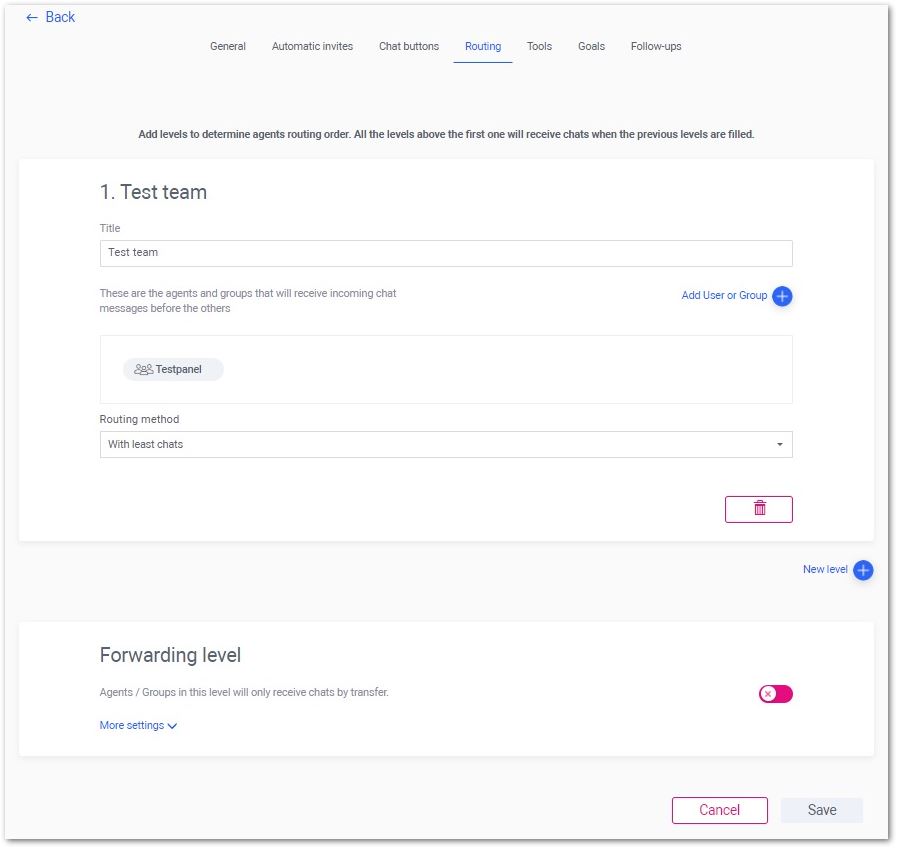
To set the routing of the campaign, you need to set a title for it, then add users or groups to it and choose the routing method. This can be set from the first section of the routing tab. The added users/groups will be the first to receive chat messages (before the others).
The routing methods are the following:
- Random
- With least chats
- With most space - the user that is set to have more simultaneous chats will be the one to receive the next incoming chat
- Sequentially
- With most chats - suitable in case some of the users have other tasks. In such cases, the incoming chat will be coming to that user until they have no more space for the next one.
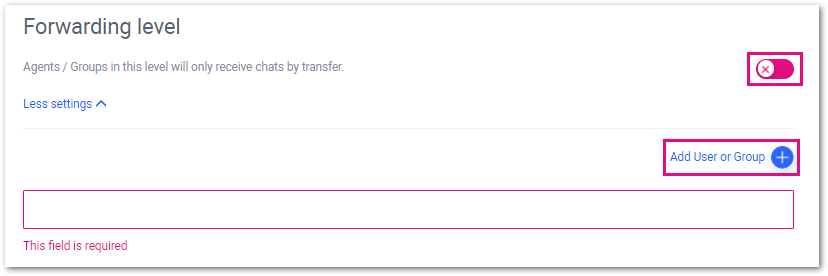
In the Forwarding level, the users/groups set there will receive only transferred chats. This function can be enabled from the toggle on the right side and when you click on “More settings” you can add the users or groups to whom these settings will be applicable.
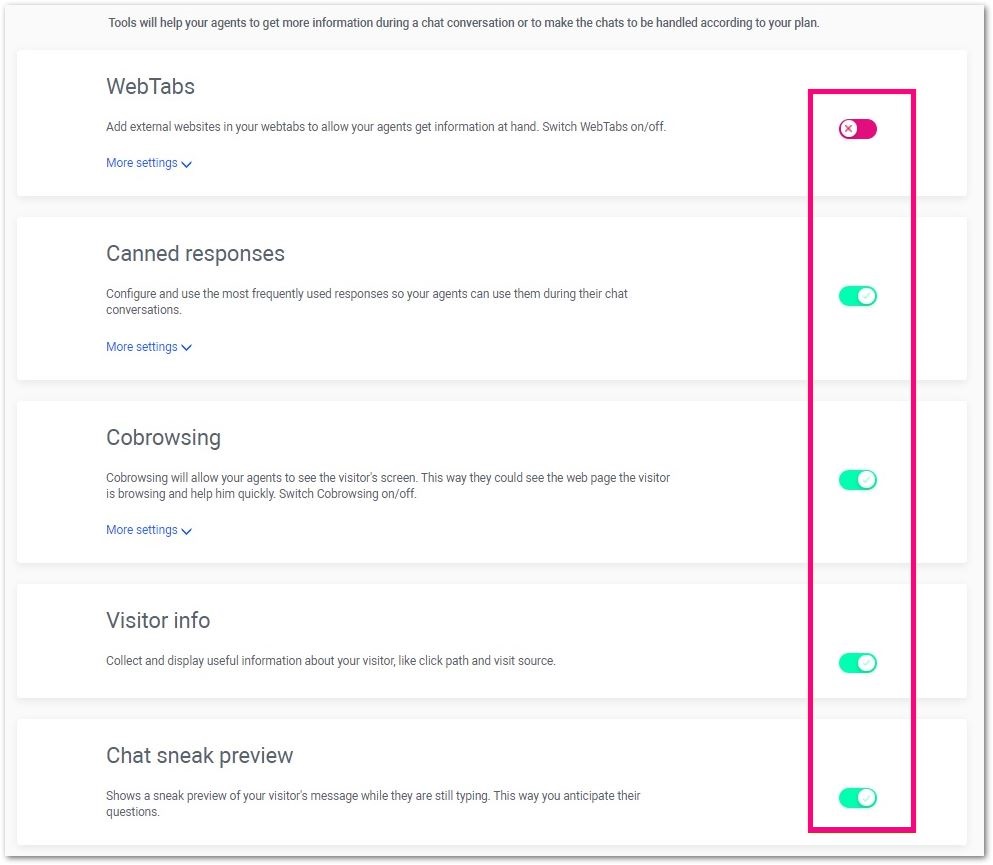
Tools
Using the tools in this section, the agents will be able to get more information during a chat conversation and make sure they handle the chats according to your plan.
The tools available are:
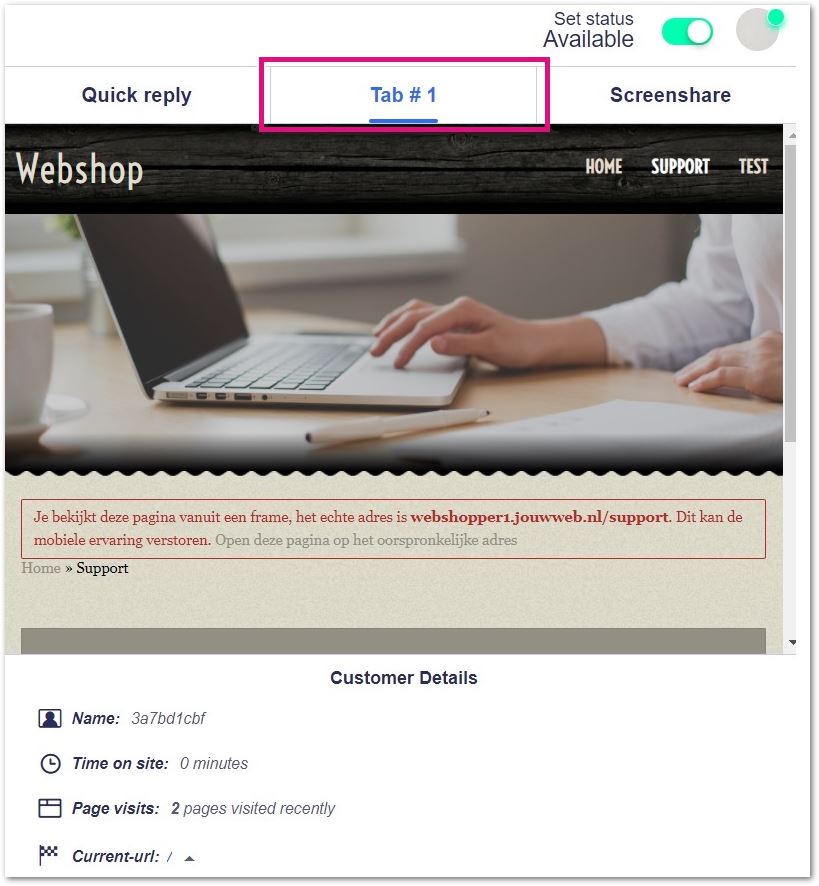
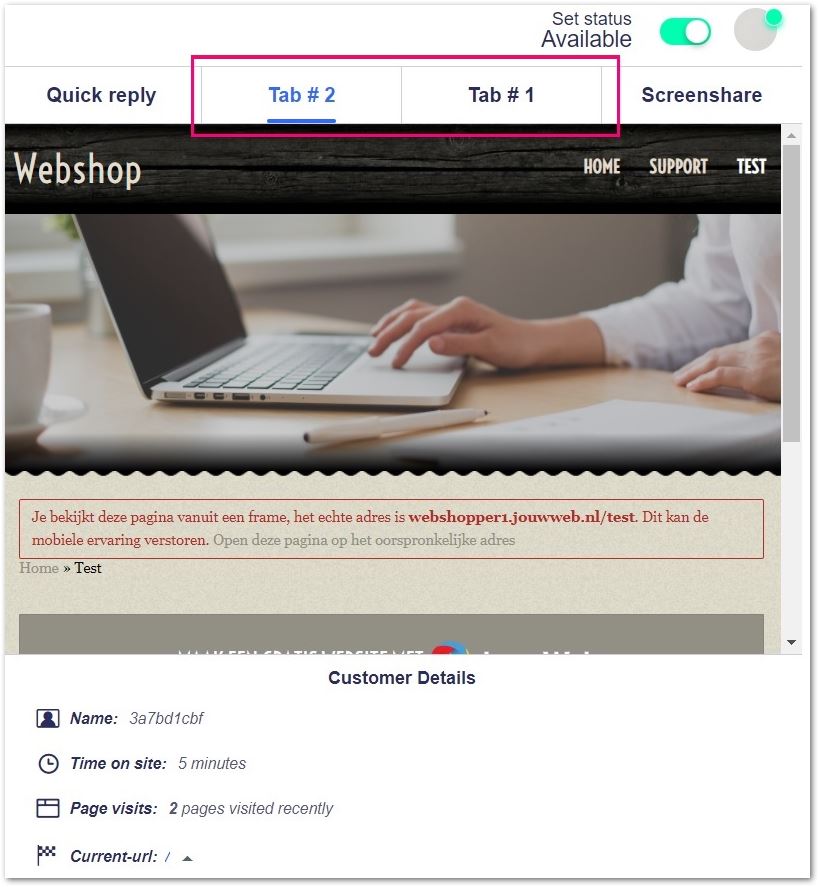
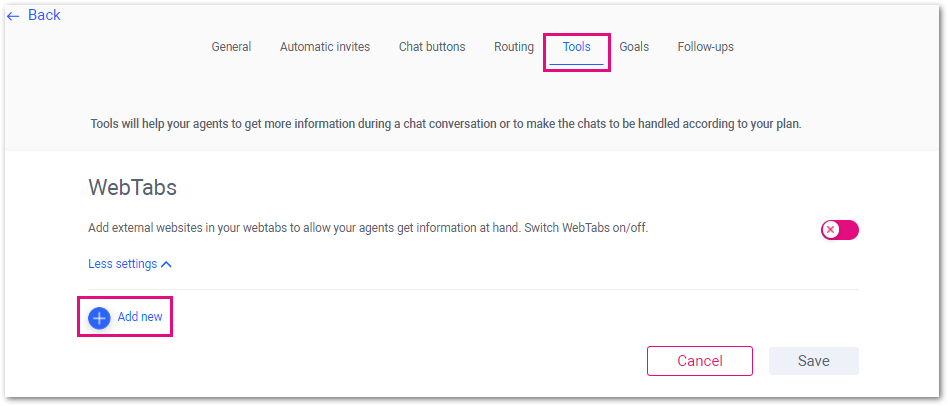
- WebTabs - links to external websites that will give the agent more information about what the customer sees. The tab will appear on the ‘Details’ section of the detailed user interface, between Quick Response and Screen share.
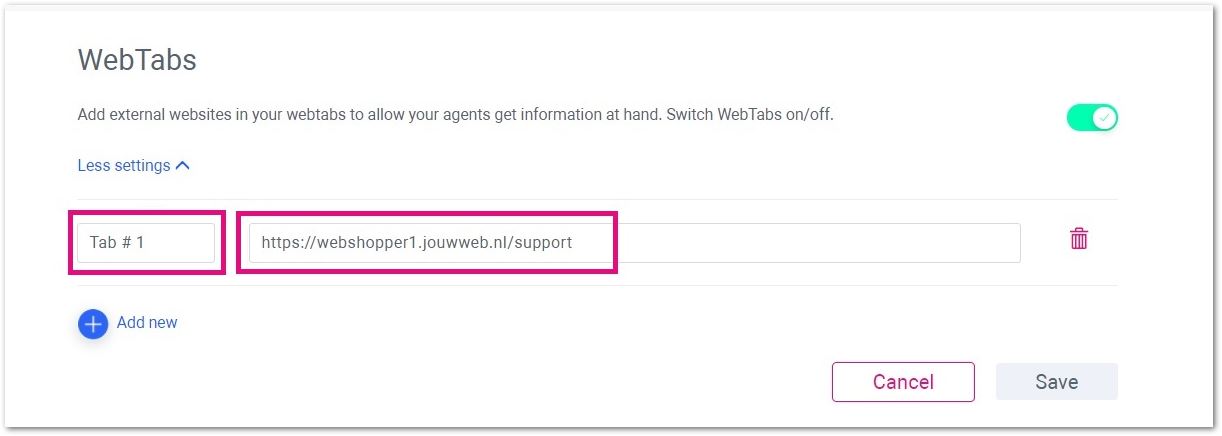
To add a new tab, you just need to use the “Add tab” button on the left bottom after clicking on “More settings”
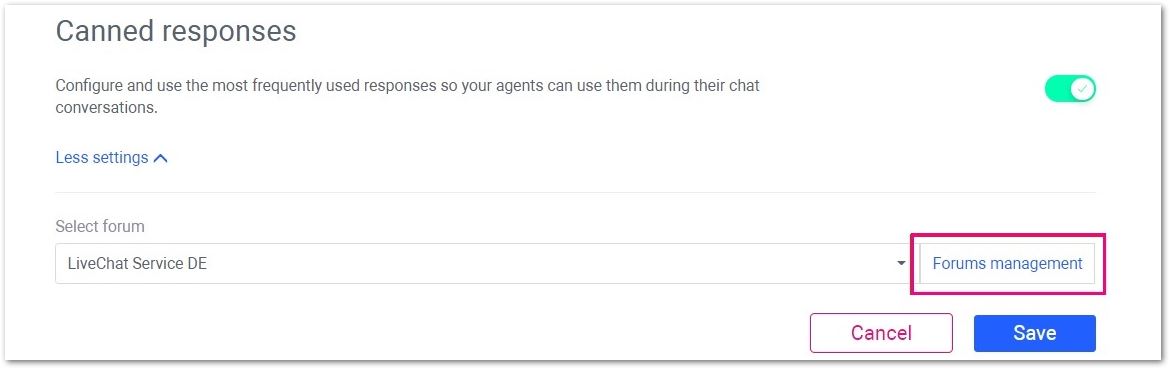
- Canned Responses - with this tool you can set your own FAQ section for the agents to use while chatting. They will be able to reply to common questions simply by typing in # and the keyword connected to the question that was asked.
This can be set by clicking on the “More settings” button at the bottom. The next step is to click on “Forum management” on the right and then select the forum you wish to edit or add questions and answers to.
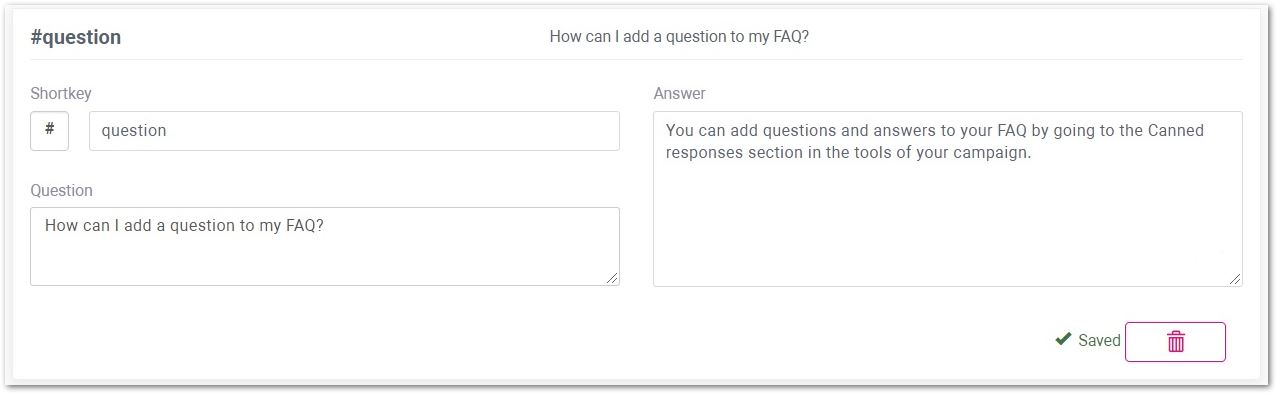
When you enter you will be able to see all the questions that are currently there if any. At the left bottom, when you scroll down to the end, you will see the “Add Q&A” button.

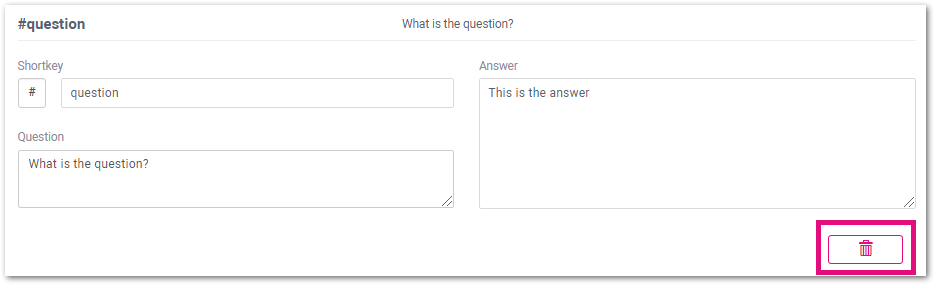
When you click on it, you can add the shortkey to be used, the question as well as the answer, they will be automatically saved. You will be able to see '✓ Saved' at the right bottom. The answer will appear in the field when the agent types in the shortkey in the chat.
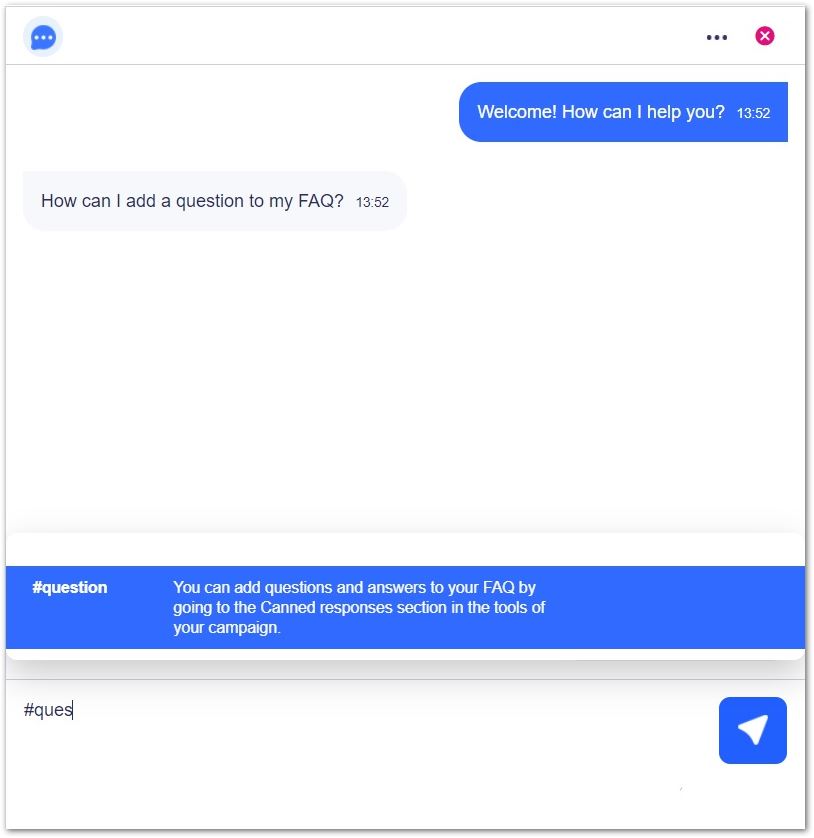
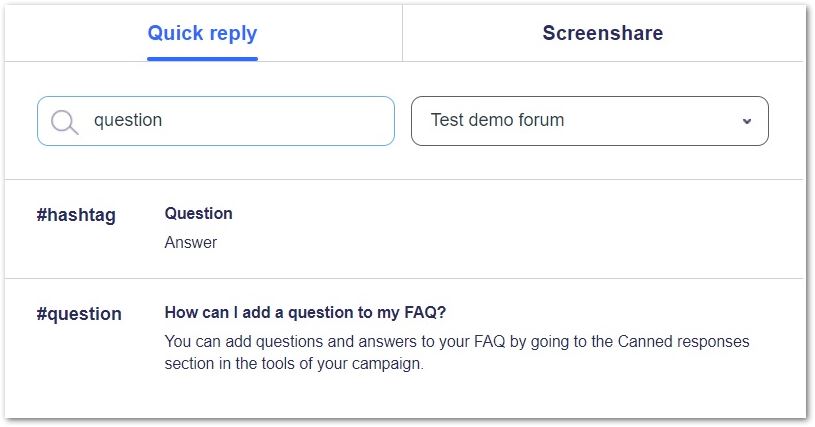
The agent can also search for the canned response from the search field in the details section of the detailed user interface. They need to make sure the correct forum is selected from the drop-down menu on the right side.
To delete a canned response, you need to click on 'Click to edit' of the questions and use the trash bin button on the right bottom.
Once you click on the trash bin, the system gives you 10 seconds to change your mind and undo the deleting. If you wish to undo it, you need to click on “Undo Removal”.

To change the title of your forum, you need to use the field at the top of the page and click on the 'Save' button after that.
From the search field, you can search for an added question. You can use any word that can be in the shortkey, the question, or the answer.
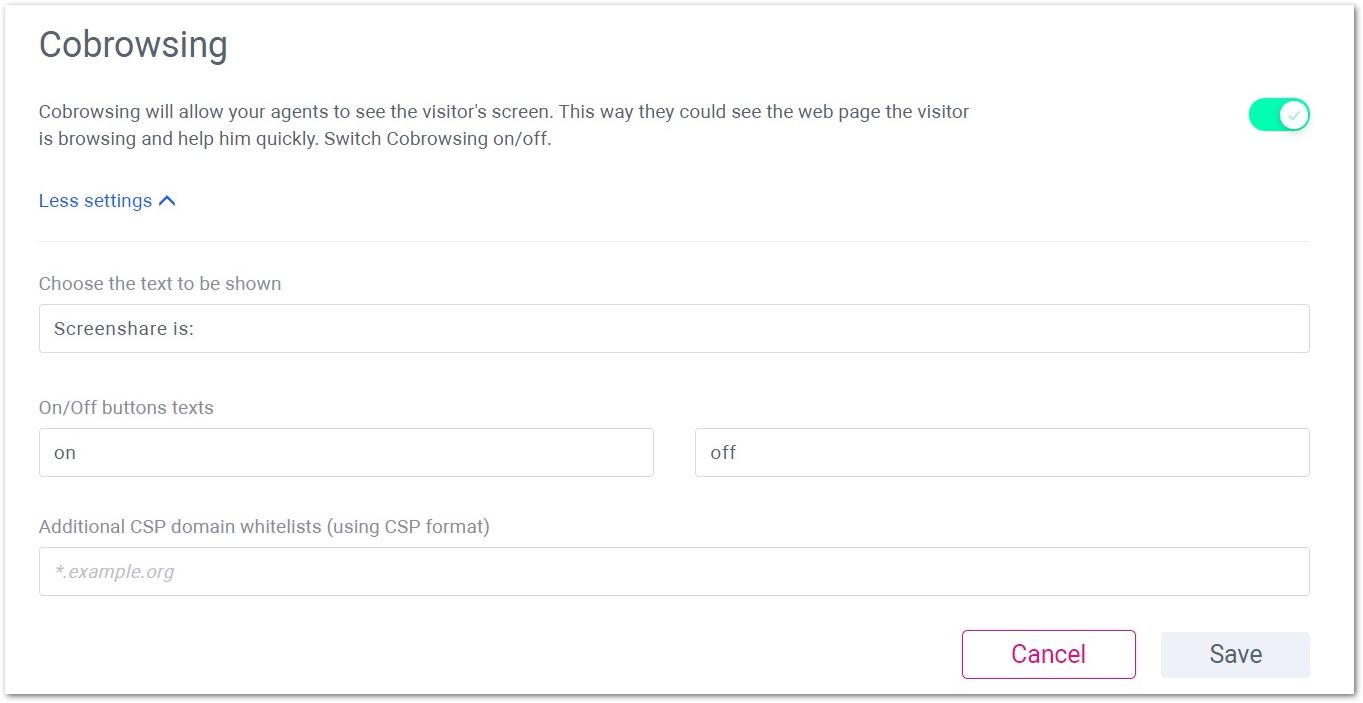
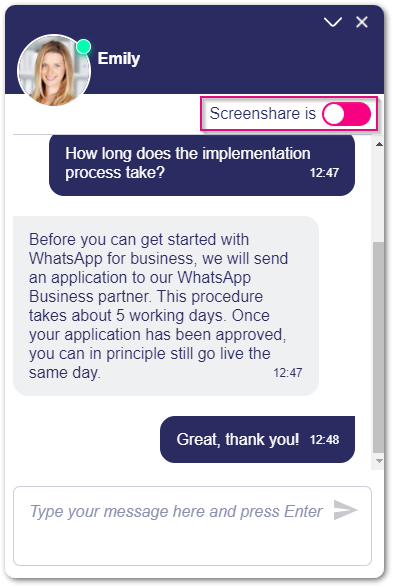
- Cobrowsing - it allows the agents to see the visitor’s screen if they have enabled the screenshare on their side from the toggle that will be available if the Cobrowsing tool is on. From the settings you can change the text to be shown, the on/off buttons’ text, and additional CSP domain whitelists.

- Visitor Info - this tool collects and displays information about the visitor - click paths, source of visit, time on site, etc.
- Chat Sneak Preview - this allows the agent to see what the visitor is typing prior to sending the message. This way the agents can anticipate their answers.
To enable or disable any of the tools, you need to use the toggles on the right side.
Goals
From this section, you can set the goals for the chat conversations. The goals available are the following:
- Success codes - with success codes, the agent can determine the main topic of the conversation that will show in a report. Success codes can be Sales, Support, Registration, etc.
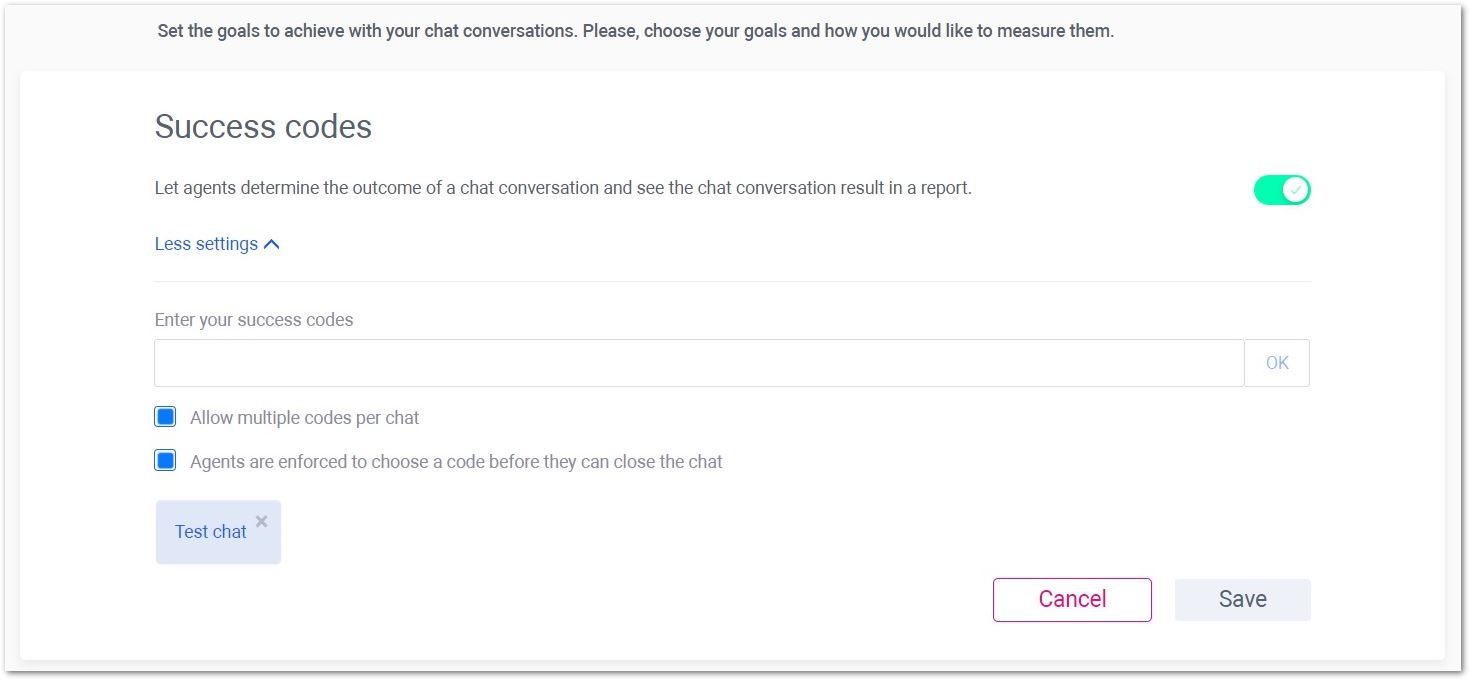
For the agents to be able to use multiple codes per chat, the 'Allow multiple codes per chat' needs to be ticked. By ticking 'Agents are forced to choose a code before they can close the chat' the agents won’t be able to close the chat without tagging the chat or giving it the corresponding success code.
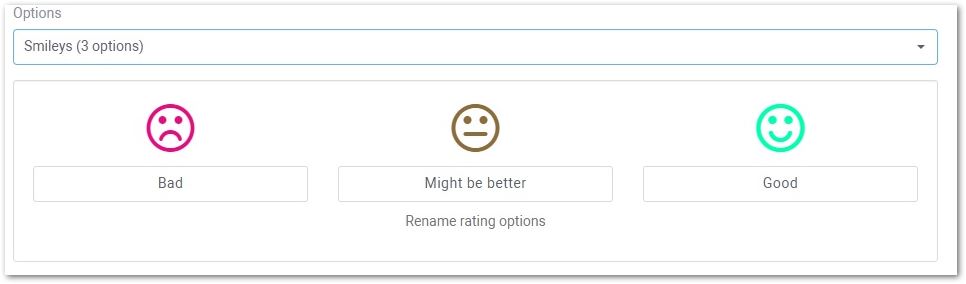
- Customer survey - the visitors are able to rate the chat conversation, which gives insight into the chats and agents' quality. The rating of the chat can be set in different ways. You can choose to have a question for the visitor (you can add it in the first field) or just have the rating by selecting smileys or thumbs up/down.
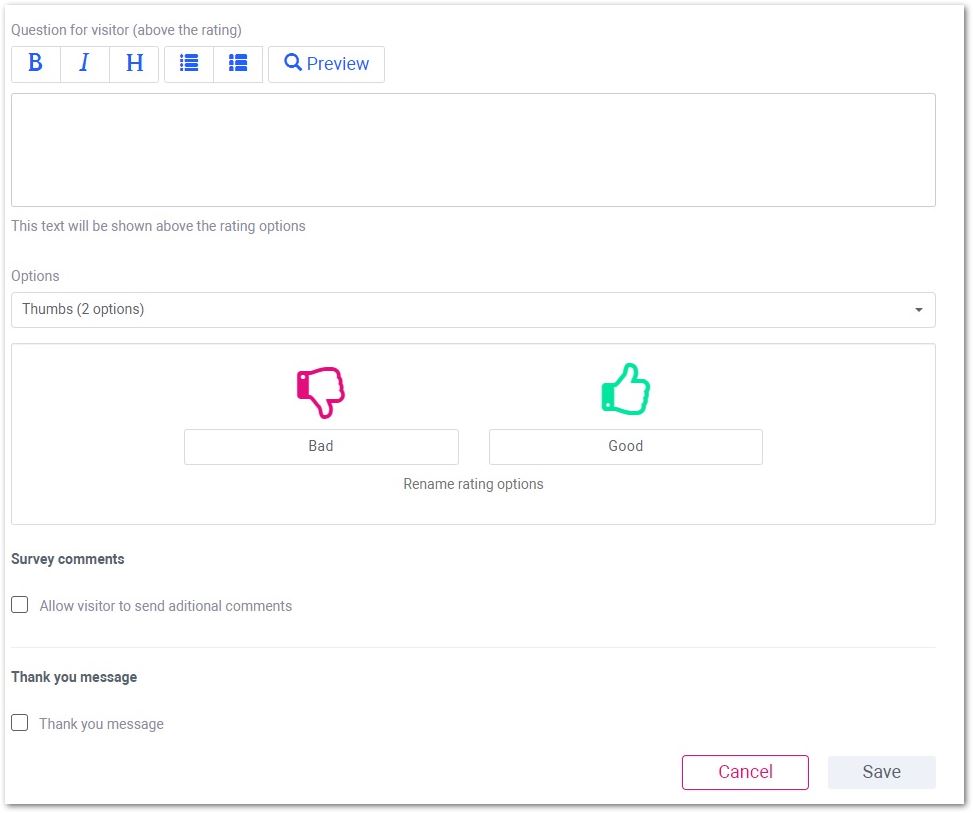
You can tick 'Allow visitors to send additional comments' in case you want the visitor to justify their selection. You can choose the text to be shown in case of additional comments.
To add a thank you message at the end, after rating a chat, you need to tick the 'Thank you message' box at the bottom. You can choose the text of your thank you message for the visitor.
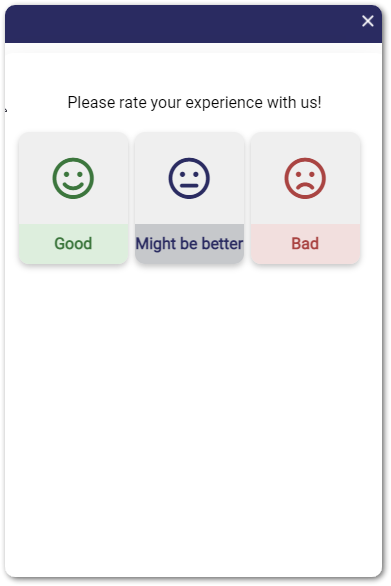

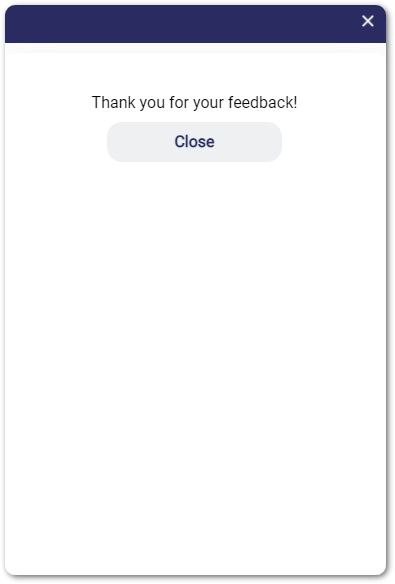
Once the visitor selects the rating, the additional comment box is displayed and once they click on submit, they can see the thank you message.
- Goals and Sales - this is a record of whenever a visitor reaches a goal that has been set. It is stored with the chat.
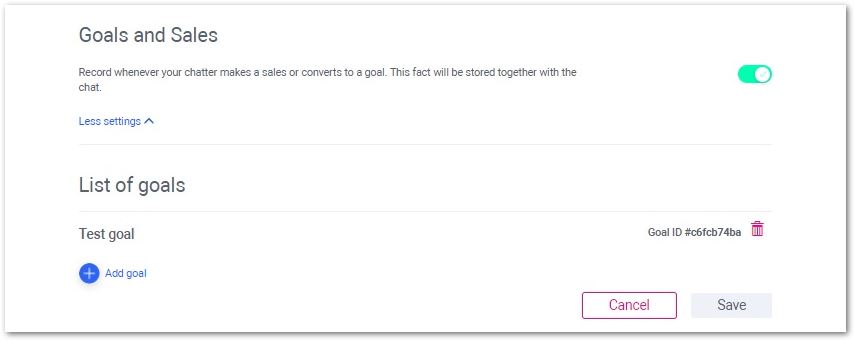
To add a new goal, you need to click on the “Add goal” button on the left bottom.

Then you can add the goal’s title, criteria, and goal value (no value, fixed value, changing value).
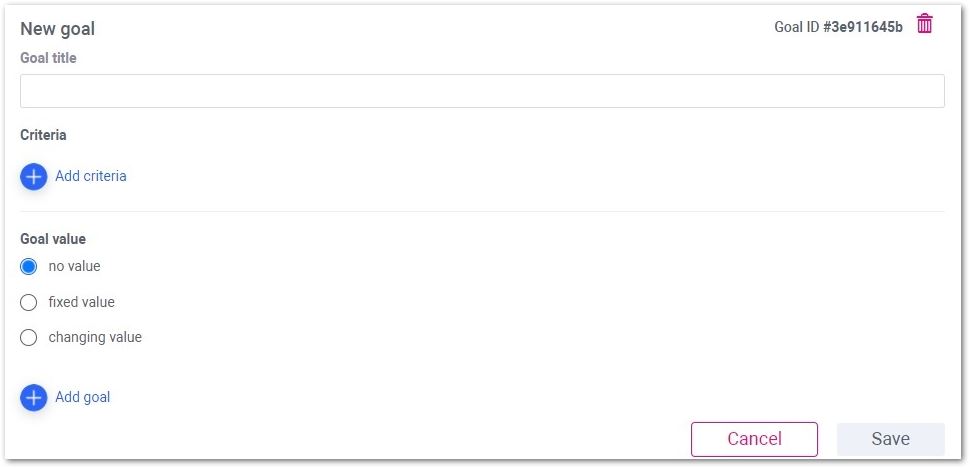
To add criteria you need to click on the 'Add criteria' button on the left, under the title’s field.
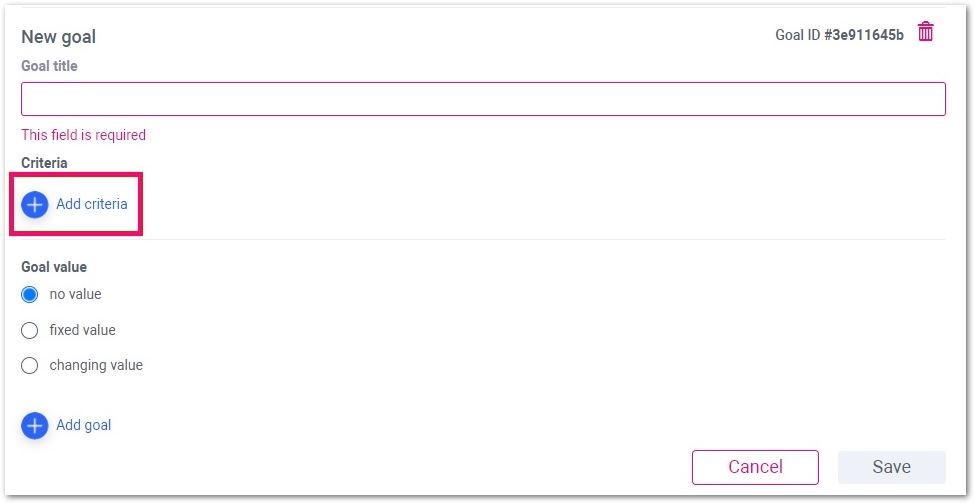
The criteria can be set according to the current page, previous page, time on page, and time on the website. In case the current or previous page is set, the page URL needs to be in the field that will appear.
For the changing value, the system will give you the JavaScript code you need to put on the page, containing the goal value. The EXAMPLE_VALUE needs to be replaced with an actual goal value. EXAMPLE_VALUE needs to be a float number or a text enclosed by single quotes.

When the goal value is fixed, you need to enter the desired amount in the field (currencies wise).
- Google Universal Analytics - allows you to automatically send events for afterward analysis.
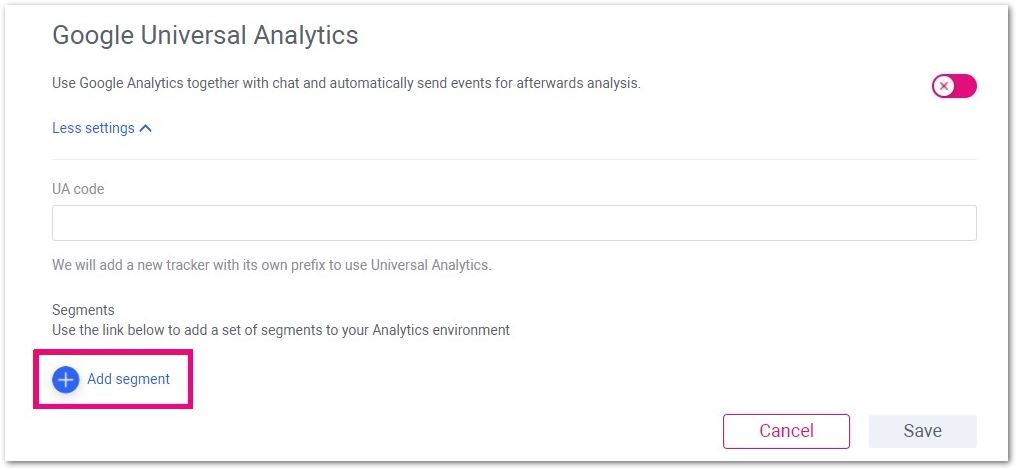
The software is able to send a great number of events to your Google Universal Analytics (GUA) in order to analyze the performance of your Chat Campaigns. These events allow you to build custom reports giving a quick overview of how visitors move through the campaign.
Follow-Ups
From here you can set up to perform follow-ups of the conversation.
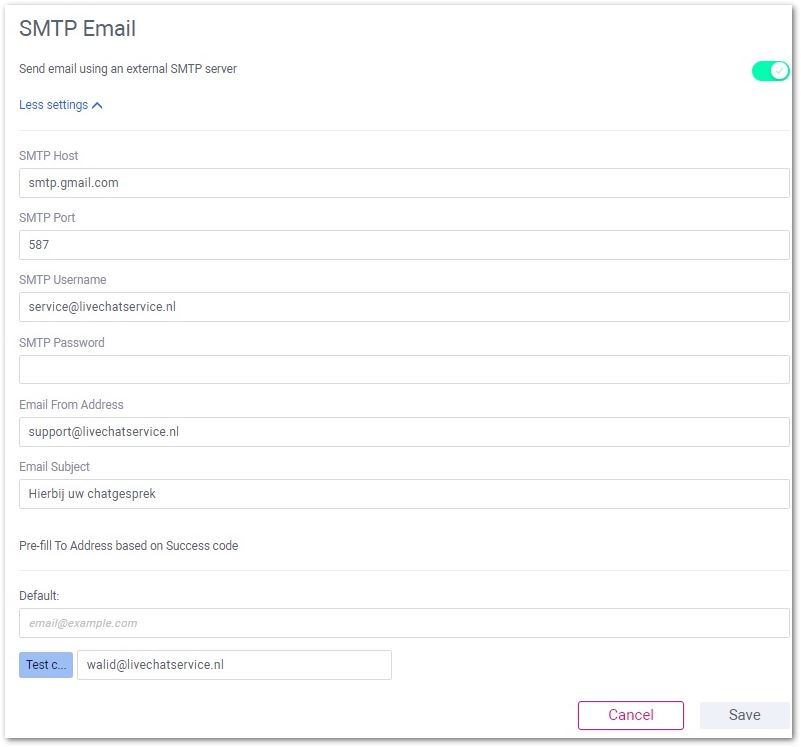
You can fill in the fields required and click on the 'Save' button at the end. To enable it, you need to use the toggle on the right side of SMTP Email.
Users & Groups
In this section, you can see all the users and groups created and you can create new groups and users.
Users
You can search for a specific user with the filters provided. You can search with name/email address, groups, chat campaigns, or status. With the status filter, you can look for either active or deleted users.
You can add a user from the 'Add user' button on the right side of the Users subcategory.

To create the account for the user, you need to fill in the following forms:

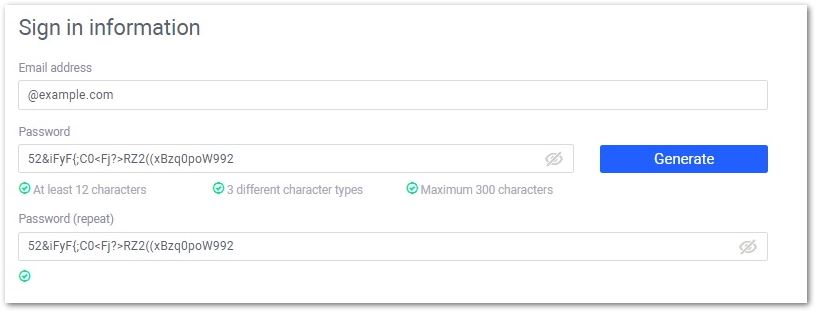
You need to set up the email address and the password. There is also an option to generate a password from the 'Generate' button on the right.

The generator will automatically fill in the password field. The user can change the password after that.
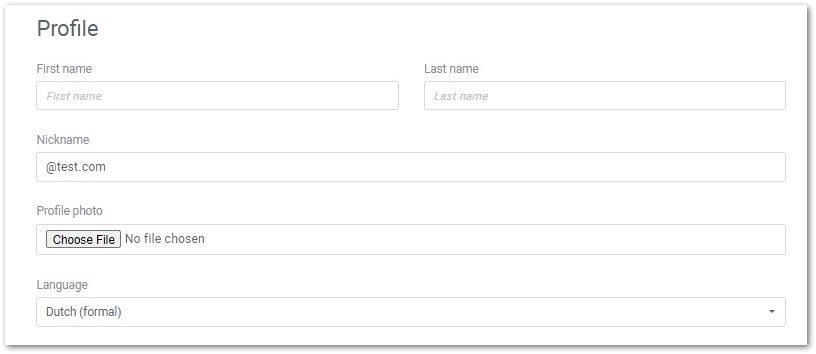
The next section is the Profile section, where the names, the nickname, the photo, and the language of the profile can be set.
And the last section to fill in, while creating a user is the rights section.
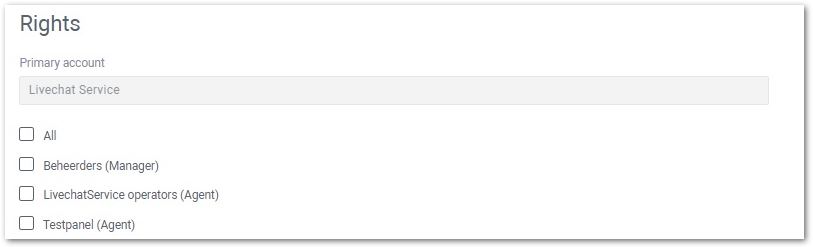
From here you can select the rights the user will have - if they will have access to the management interface and be able to change things in it, or they will only be able to log in as agents and only deal with the incoming chats. Once it is all set, you need to click on the 'Save' button to save the settings.
From the user's section, you can also change the settings of the already existing users. In order to do that, you just need to select the user from the list and click on it.
There are three subcategories there - Personal Info, Groups, and Security.
From ‘Personal Info’ you can change the user’s names, nickname, email address, language as well as other settings that can be enabled.
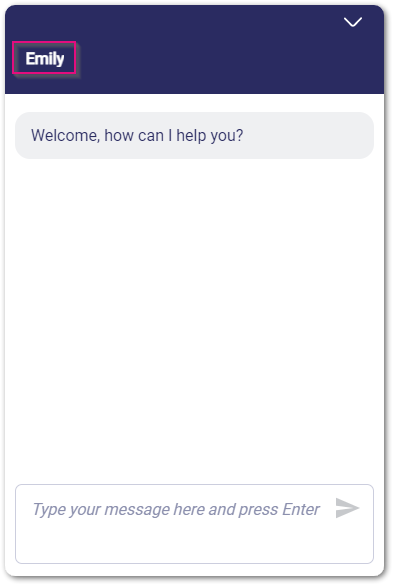
In order to remove the photo of the user, so that it doesn’t show in the chat window, you need to untick the 'View profile photo' box.
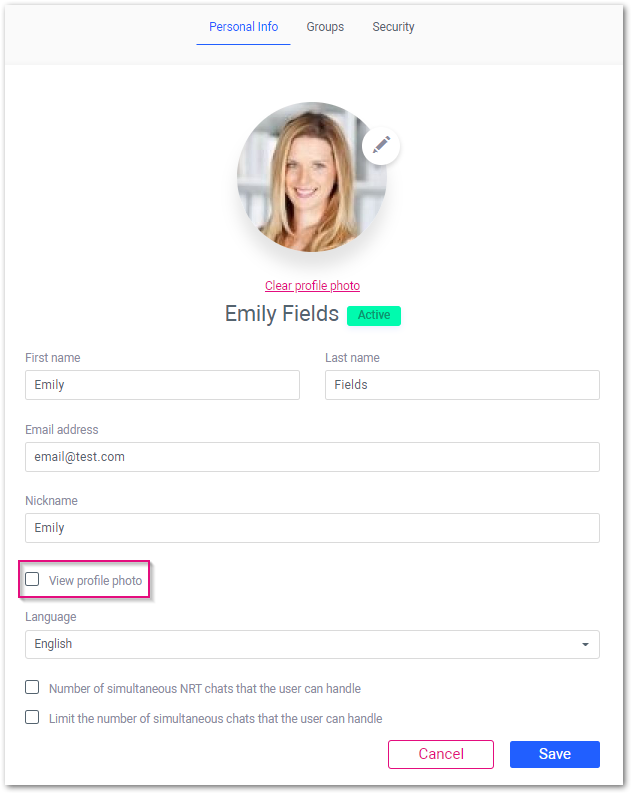
To set the number of simultaneous NRT chats that the user can handle you need to tick the corresponding box and fill in the number you desire in the field.
To set the number of simultaneous chats that the user can handle, you need to tick the corresponding box and fill in the desired number in the field.
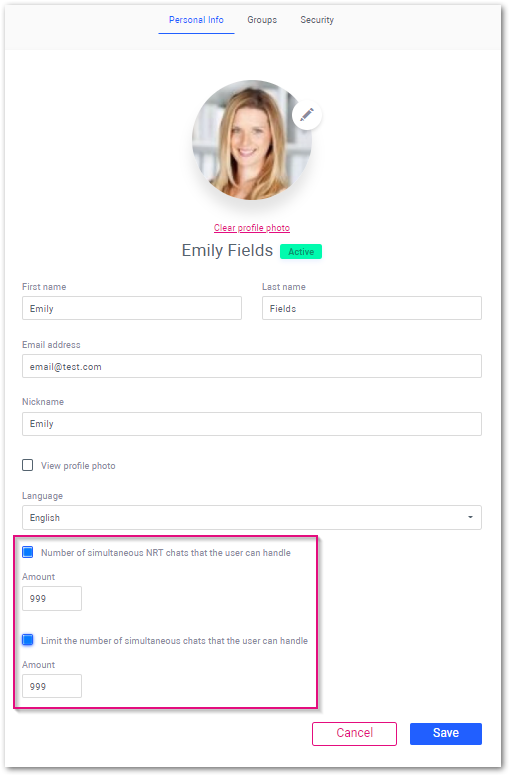
The set numbers will then show in the list under live chats and NRT chats.
In this example, the user is set for 28 simultaneous chats and 15 simultaneous NRT chats.

In the case of unlimited chats set or box unticked, the user will be able to receive unlimited amounts of simultaneous chats. This is how it will look at the summary for such a user.

From the group's section, you can change the groups the user belongs to by ticking or unticking the boxes of the groups.

From the Security section, the password can be changed as well as the IP settings. You can write a password of your choice or let the generator create one for you with the 'Generate' button.
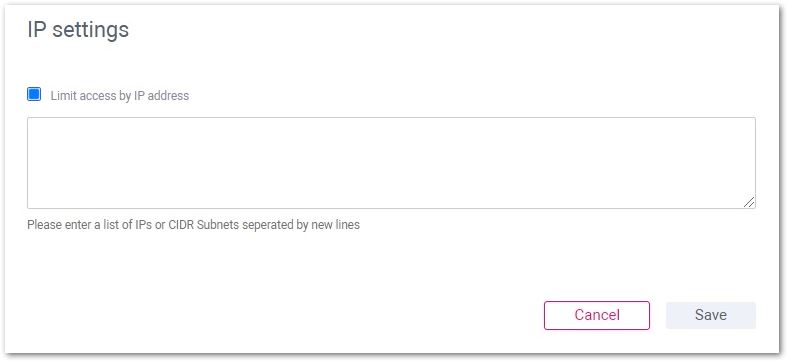
From the IP settings, you can set limit access by IP address. In the field that will appear after ticking the box, you can enter a list of IPs or CIDR Subnets. They need to be separated by newlines.
Groups
In the groups section, you can see all the groups created and search for a group by its name.
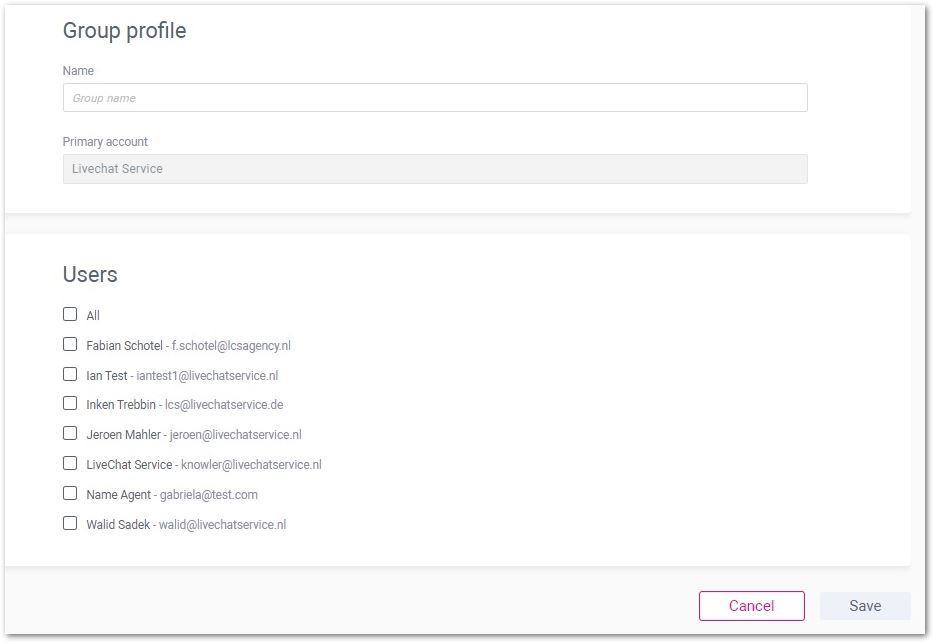
To add a new group, you need to use the “Add group” button on the right side.

Once you have clicked on the “Add group” button, you just need to set the name for the group and which users it will include.
To log out of your account, you need to click on the photo on the right upper corner and click on the 'Sign Out' button.
So now you know all the settings there are and how to work with them. You are good to go! Success!